Setting up forwarding addresses and simple mailing lists
- Log in to the Tokyo Institute of Technology Portal with e-mail domain administrator credentials and click the "E-mail Management for Admin" menu under System Management.

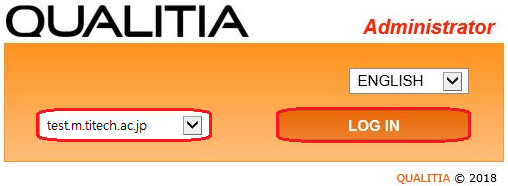
- Select the domain that you want to configure and click "LOG IN".

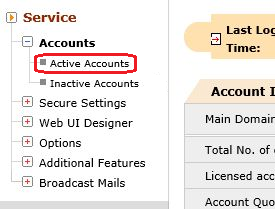
- Click "Active Accounts" on the the menu on the left side of the screen.

- Click "Alias" on the right side of the Active Accounts screen.

- Click the "Add Alias" link in the middle of the screen.

- To register users individually,
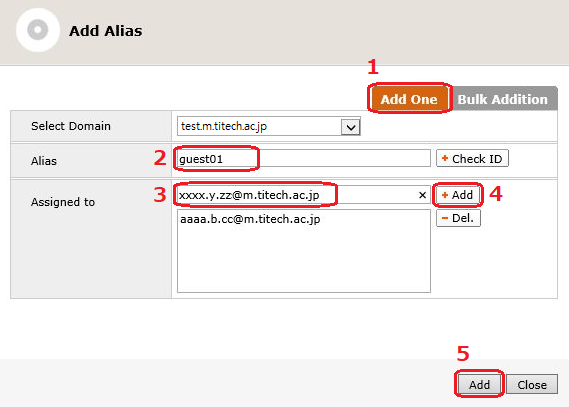
- Click the "Add One" button on the right side of the top menu.
- Enter the forwarding source address (everything before the "@" symbol) in the "Alias" section.
- Enter the forwarding destination address (an "m" address or off-campus address") in the "Assigned to" section.
- Click the "Add" button, and then the address will be listed on the box below.
- Once you have filled in the necessary fields, click the "Add" button at the bottom of the screen.

- To register users as a group,
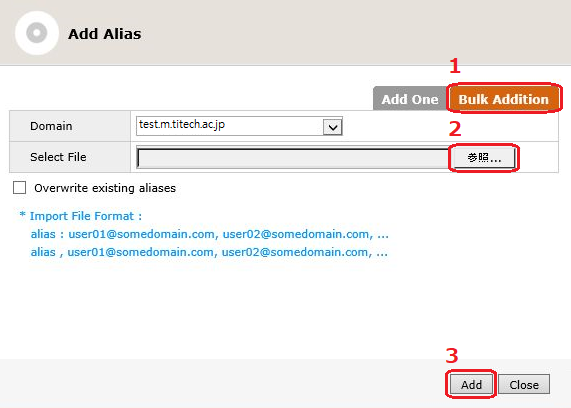
- Click the "Bulk Addition" button on the right side of the top menu.
- Click "参照 (Browse)" and select a CSV file.
- Once you have finished selecting a CSV file that you wish to add, click the "Add" button at the bottom of the screen.
Forwarding source address, forwarding destination address
Forwarding source address, forwarding destination address 1, forwarding destination address 2, forwarding destination address 3, ...

- You will see a list of addresses once you have finished configuring the settings.
You can "Edit" and "Delete" as nessesary.

Return to the E-mail domain forwarding service page
