
Setting up Thunderbird
To use mail software, please get tokyotech mail auth ID from Tokyo Tech Portal.Thunderbird is a free e-mail application for Windows, Linux, Mac OS, and other operating systems.
See Thunderbird manual for new version.
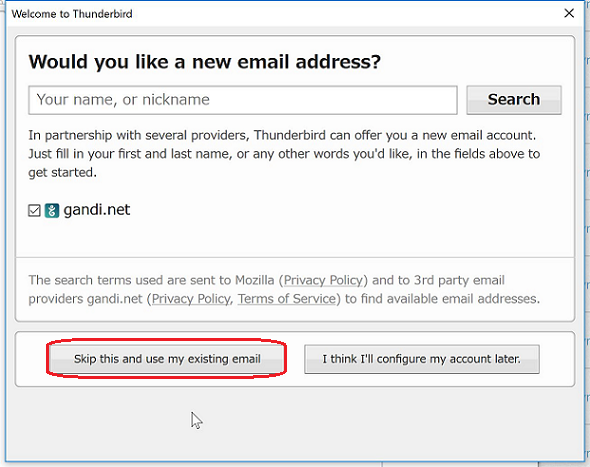
- When you start Thunderbird for the first time, you will see an e-mail account setup screen.
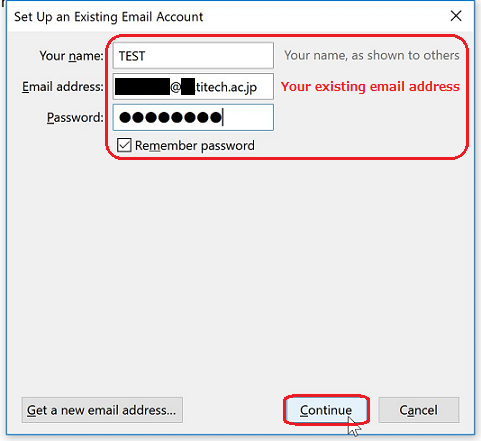
- Enter your name, e-mail address* and passwaord**. Then click "Continue".
*Your Tokyo Tech Mail address (xxxx.x.x@m.titech.ac.jp) or the sender address that you want to use for your academic major/department e-mail address.
**The password is the same one as yours when you log in to the Portal via Matrix Authentication.
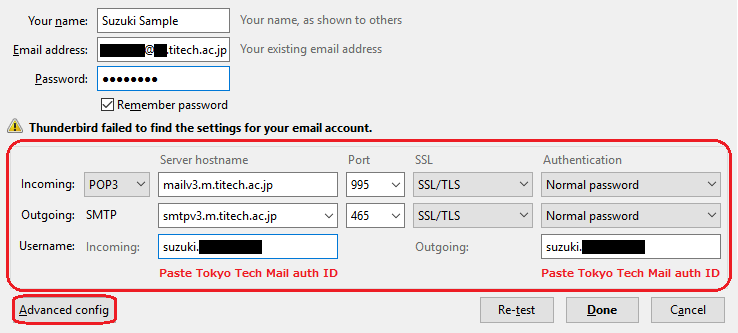
- After Thunderbird has automatically searched for account settings, edit the configuration information.
*Ignore the error of "Thunderbird failed to find the settings for your email account." and continue your settings.
- Select either "POP3" or "IMAP" for your incoming server type.
- Set the incoming server to "mailv3.m.titech.ac.jp" and change "SSL" to "SSL/TLS".
- Set the incoming port to 995 if you are using POP3 or 993 if you are using IMAP.
- Set the outgoing server to "smtpv3.m.titech.ac.jp" and change "SSL" to "SSL/TLS".
- Set the outgoing port to 465.
- Set the authentication method for both the incoming server and the outgoing server to "Normal password".
- Account name: tokyotech mail auth ID
- Once you have filled in all the fields, click "Advanced config".
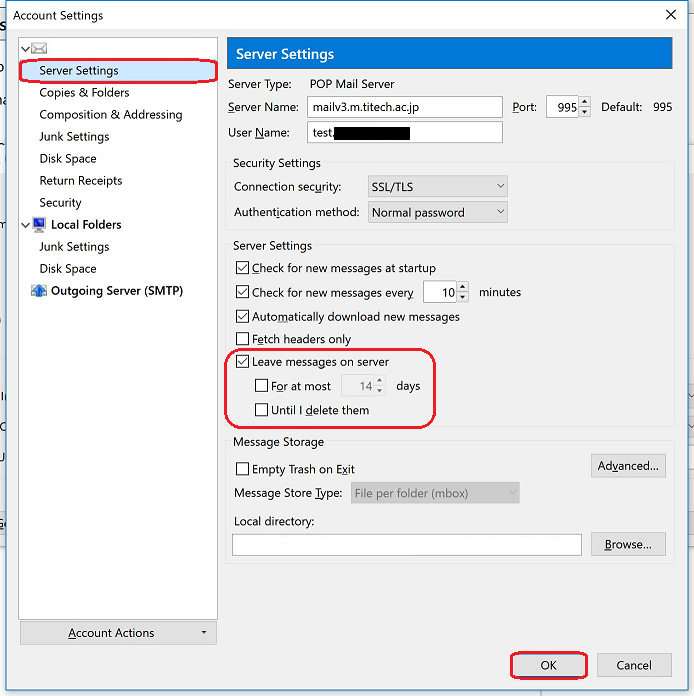
- When using POP3
If necessary, click "Server Settings" on the left side of the window and select the "Leave messages on server" check box. Click "OK" to complete the setup process.
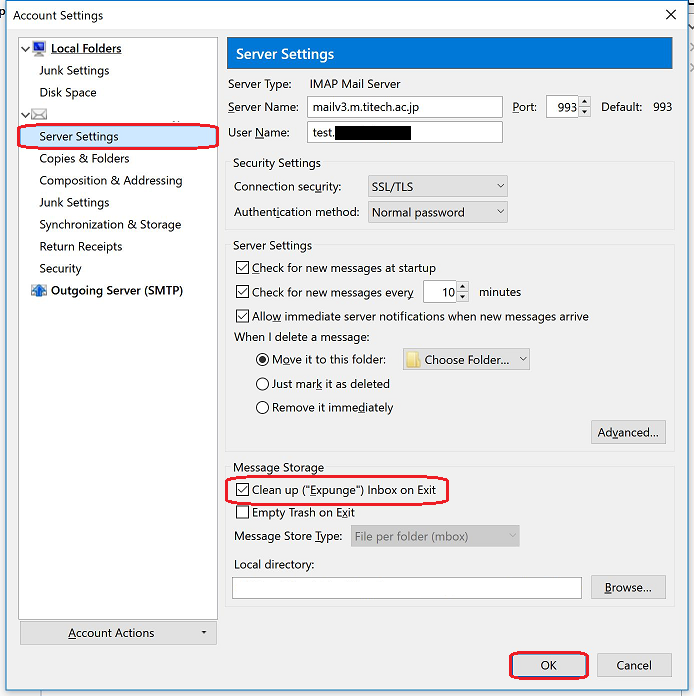
- When using IMAP
Click "Server Settings" on the left side of the window and select the "Clean up ("Expunge") Inbox on Exit" check box. Click "OK" to complete the setup process.
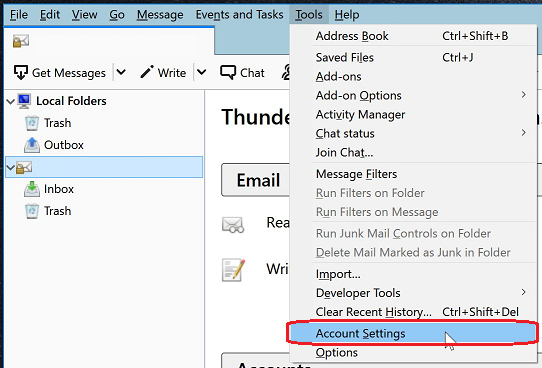
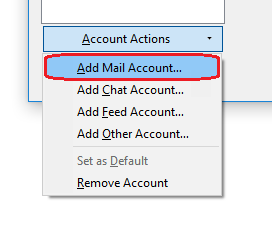
If you do not see the setup screen, open "Tools" > "Account Settings" from the menu bar and then click "Account Actions" > "Add Mail Account".
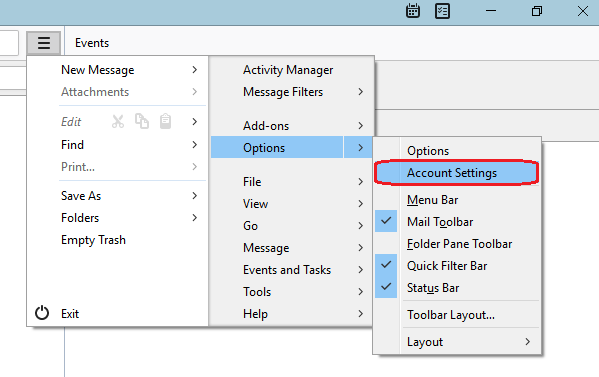
*Or you can find "Account Settings" from the menu on the top right side of the screen.
Folder management (IMAP only)
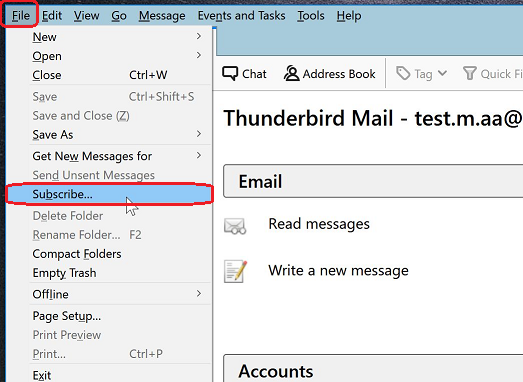
- Click "File" > "Subscribe".
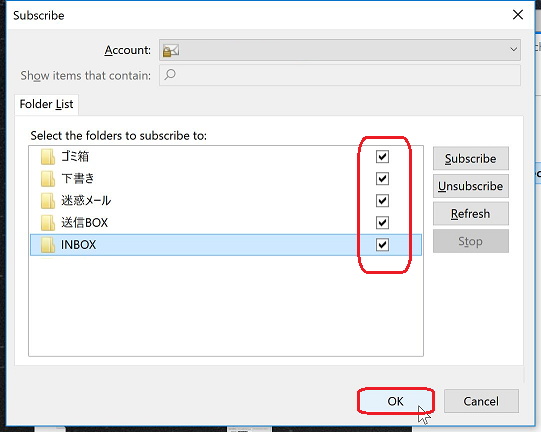
- The application will connect to your mail server and display a list of your Webmail folders.
Here, you can choose which folders to show and which folders to hide in Thunderbird.
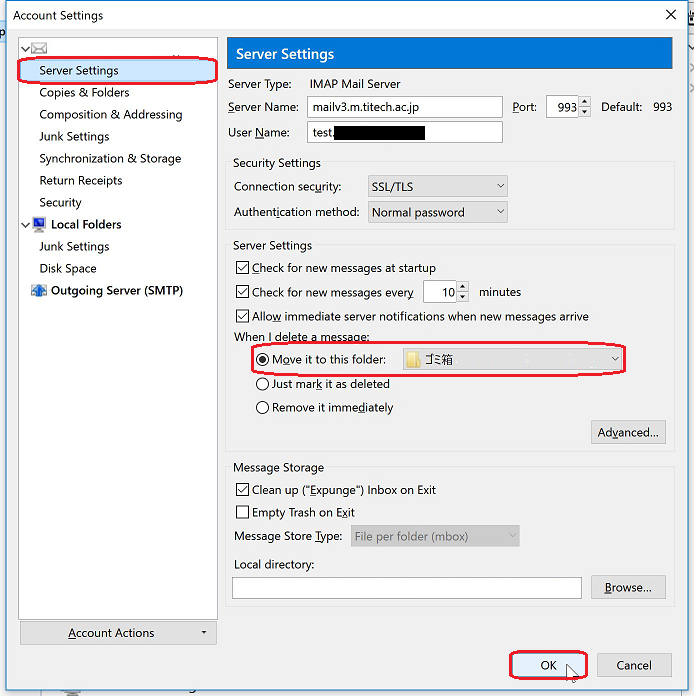
- In the Account Settings window, select "Server Settings".
In the "When I delete a message:" section, select "Move it to this folder" > "Trash" to synchronize the Trash in Thunderbird with your Webmail.
* Note that e-mails that have been in your Webmail Trash for 30 days will be automatically deleted.
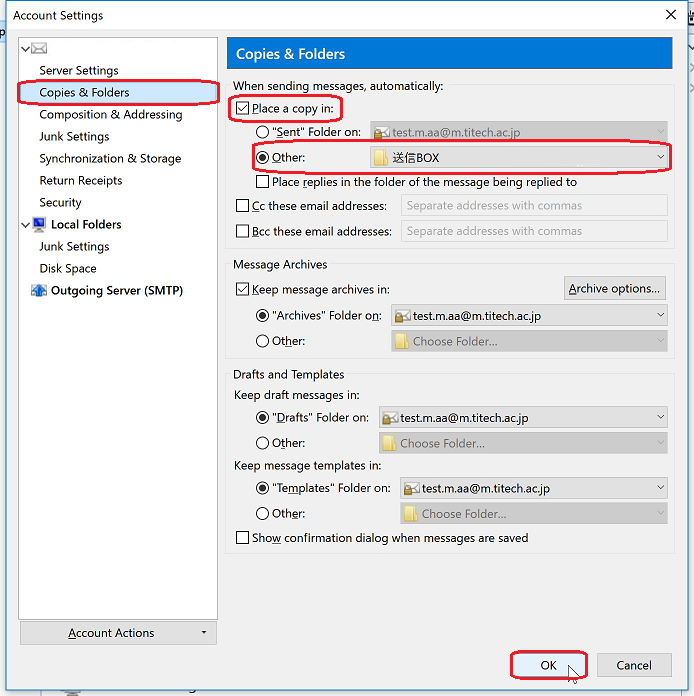
- Select "Copies & Folders" from the left side of the Account Settings window.
In the "When sending messages, automatically:" section, select the "Place a copy in" check box.
Choose "Other" and select the "... Sent BOX folder" to synchronize sent messages in Thunderbird with your Webmail.
Go back to the "Setting up e-mail applications" page