
Webmail
Contents
- Using Webmail
- Webmail basics
- Changing your "From" display name
- Setting up automatic forwarding
- Setting up automatic sorting
- Forwarding to a mobile phone e-mail address
- Selecting all the e-mails in a folder
- Saving e-mails
1. Using Webmail
When you log in to the Tokyo Institute of Technology Portal, you will see "Tokyo Tech Mail" on the top page. Webmail allows users to do the following.
* You need to register your name reading before you can use Webmail.
- Send and receive e-mails
- Automatically sort new e-mails and spam
- Automatically forward e-mails sent to a Tokyo Tech Mail address
- Receive external e-mail via POP3
- Messages in your "Trash" and "Spam" folders are automatically deleted after 30 days
2. Webmail basics
When you access the Webmail system from the Tokyo Institute of Technology Portal, you will see a screen similar to the one below. This section covers the numbered items: what they are and what they let you do.
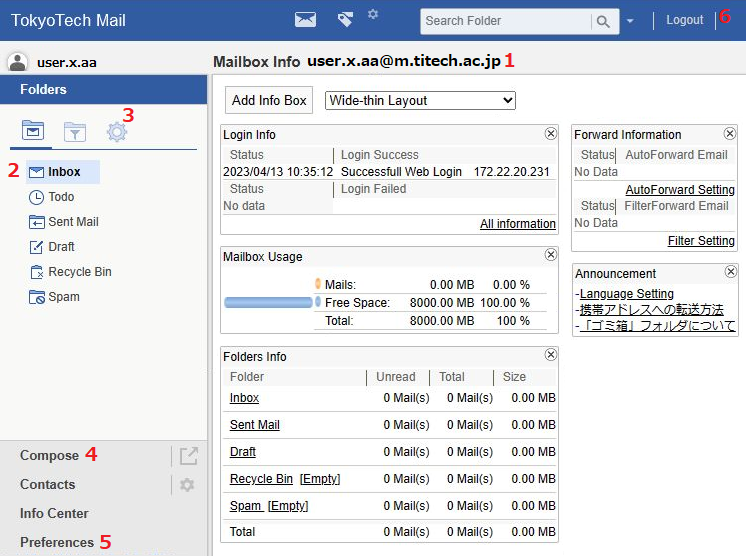
- Your e-mail address
- Move to the folder containing the e-mails that you have received
- Access folder management tools (which you can use to create personal folders)
- Compose a new e-mail (to send)
- Access your preferences (which you can use to configure automatic sorting, automatic forwarding, language settings, and other settings)
- Close the Webmail system; always use this button to logout and close the system
Receiving e-mail
If you click the "Inbox" item on the Webmail top page, the following type of screen will appear.
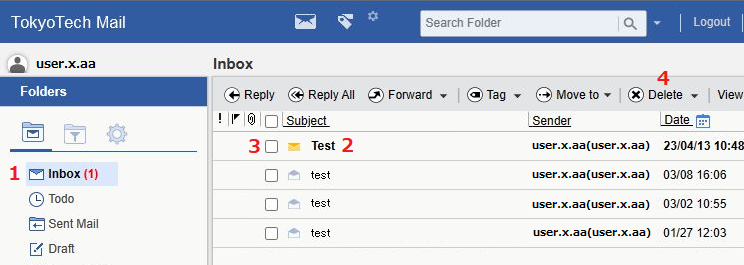
- Click the subject of a message to read the message.
- Click the check box next to the subject to select the message (or, if there is already a check mark in the check box, deselects the message).
- Click this button to delete all the selected messages (which sends them to the Trash folder).
Sending e-mail
If you click the "Compose" item on the Webmail top page, the following type of screen will appear.
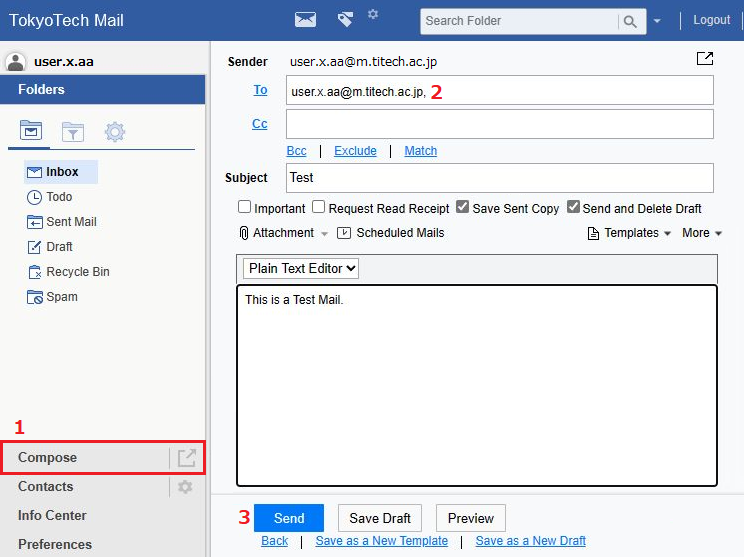
- Enter the recipient's address in the "To" field.
- After composing your message, click the "Send" button to send it.
3. Changing your "From" display name (sender display name/sender address)
If you want to change the e-mail sender display name only
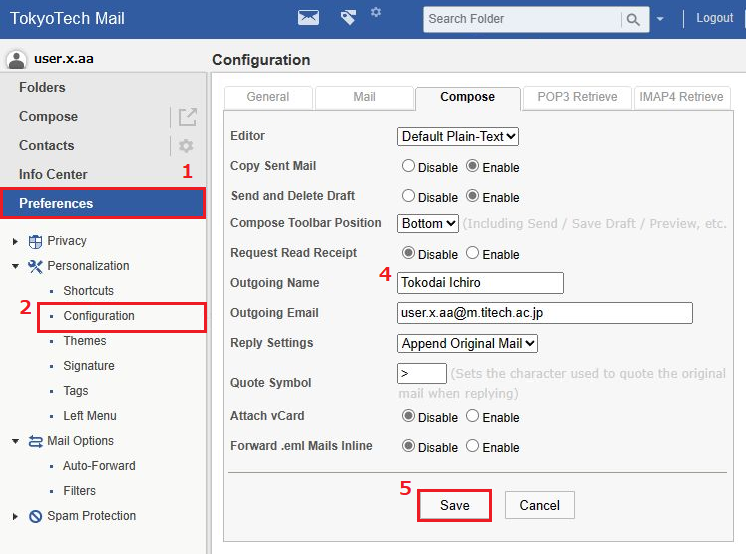
- Select "Preferences".
- Select "Usage environment settings" under "Personal settings".
- Select "Composing e-mails".
- Enter your preferred sender name.
- Click "OK" to apply the changes.
If you want to change the e-mail sender address
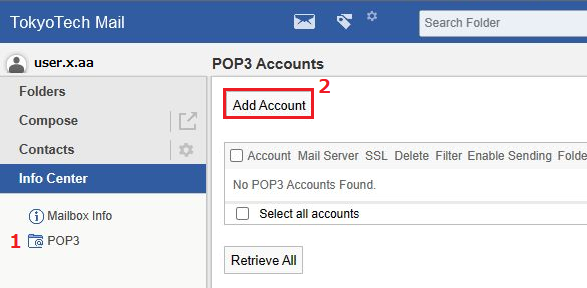
- Under "Advanced options", select "External e-mail".
- Click "Add".
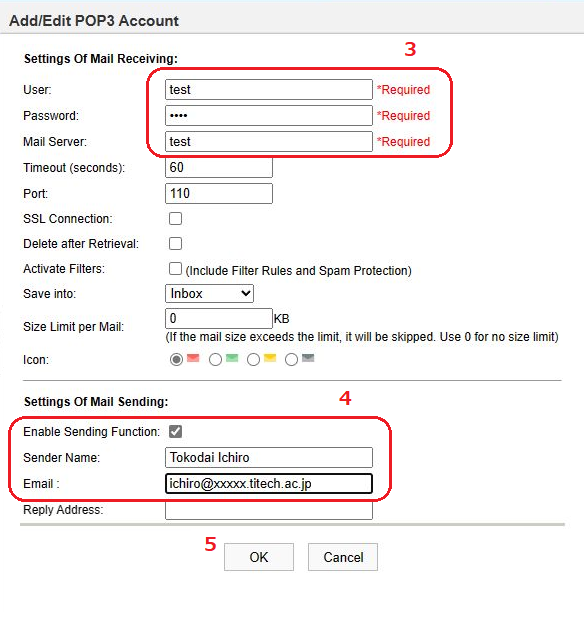
- Set the "User account" to "test",
your password to "test",
and the mail server to "test".
You will get an error if you try to receive e-mails, but you do not need to enter a correct "m" address or password at this point. - Select the "Allow sending" check box and enter your preferred sender name and your academic major/department e-mail address.
- Click "OK" to apply the changes.
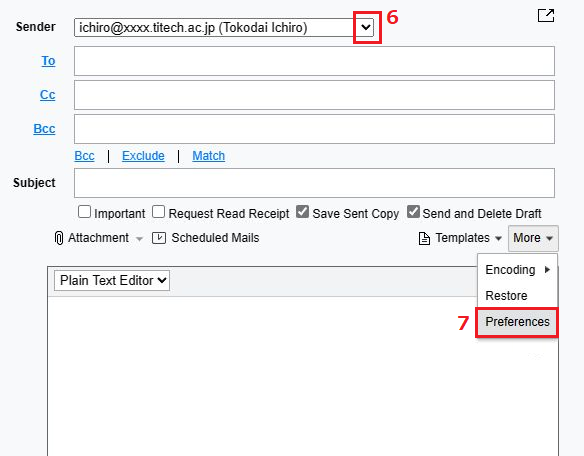
- When composing an e-mail, you can click "From" to select the address that you want to send the message with.
- To select your default display address, click "Various settings" under "Tools".
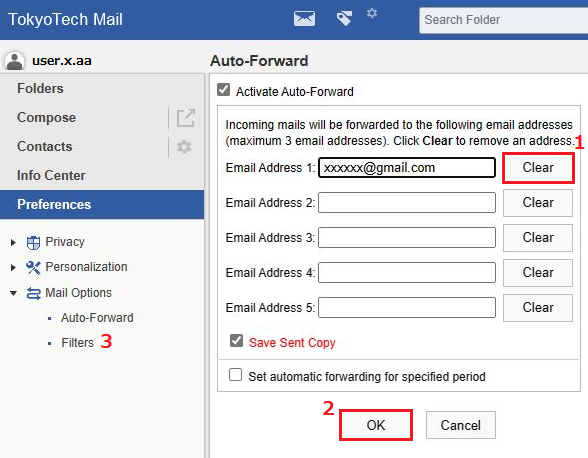
4. Setting up automatic forwarding
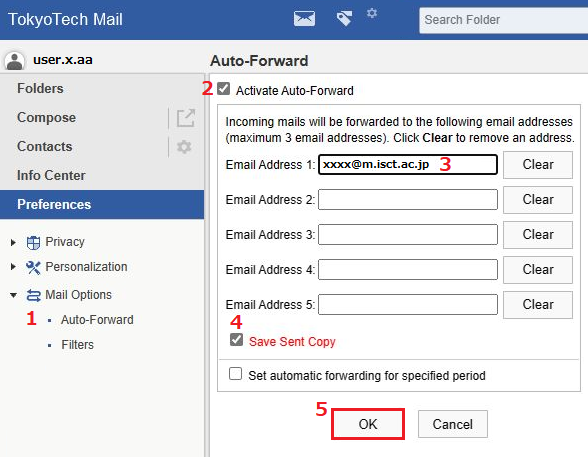
- Under "Preferences", select "Mail handling" and then "Automatic forwarding".
- Select the "Use automatic forwarding" check box.
- Enter the e-mail address(es) that you want to forward messages to (up to 5 addresses)
If you want to forward e-mails to a mobile phone address, follow the instructions in Forwarding to a mobile phone e-mail address. - Select the "Leave a copy of each message" check box.
Otherwise, the system will not store your messages on the server. - Click "OK" to apply the changes.
- If you would like to set up conditional forwarding, use automatic sorting to configure the forwarding procedures.
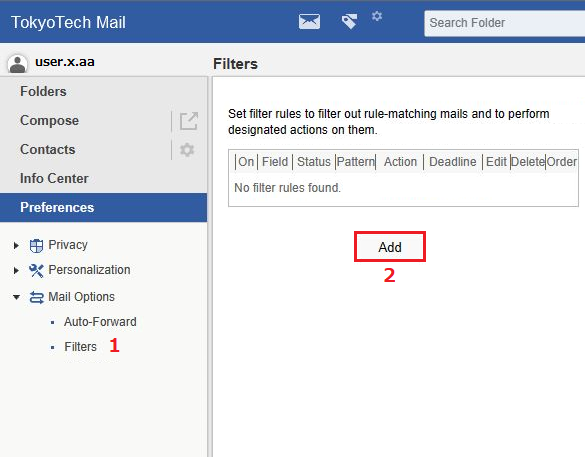
5. Setting up automatic sorting
- Under "Preferences", select "Mail handling" and then "Filtering".
- Click "Add condition".
- Select or enter your condition.
- Select or enter the corresponding handling procedure.
- Click "OK" to apply the changes.

The Tokyo Tech Mail System uses spam filters to mark certain messages as spam and store them in the "Spam" filter. If you configure filtering, your personal settings take priority over any spam filters.
If you want to give priority to the spam filters, see the Using spam filters in Webmail and configure your priority settings accordingly.
6. Forwarding to a mobile phone e-mail address
- Due to message size restrictions on mobile phones, we recommend filtering messages that you forward to your mobile phone.
- If you previously specified your mobile phone e-mail address in your automatic forwarding settings, click the "Clear" button to clear the setting.
Proceed to the next step if this is your first configuration.
- Under "Preferences", select "Mail handling" and then "Filtering".
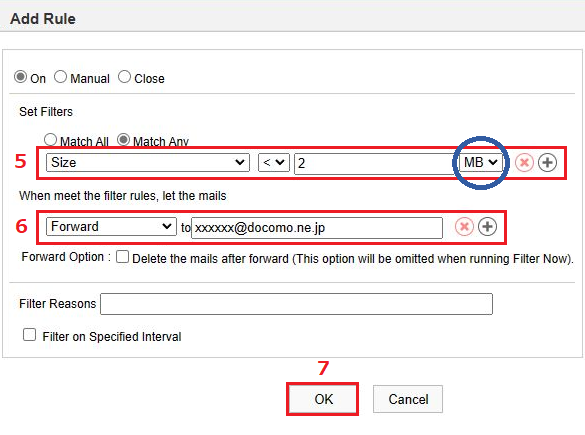
- Click "Add condition".

- Click "Filtering", select "E-mail size", enter "1m" in the field, and select "or smaller".
- Under the "If the message satisfies the filter rule" section, select "Forward to" and then enter your mobile phone e-mail address in the address field.
- Check that the settings are correct and then click "OK".
- Send a test e-mail to your own Tokyo Tech Mail address to make sure that you receive the message at your mobile phone e-mail address.
Also configure your mobile phone filtering settings to allow e-mails from titech.ac.jp. - If you would also like to get notifications on your mobile phone when you receive an e-mail that exceeds the size limit, click "Add condition" again.
- Click "Filtering", select "E-mail size", enter "2m" in the field, and select "or larger".
- Under the "If the message satisfies the filter rule" section, select "Send an 'e-mail received' notification to" and then enter your mobile phone e-mail address in the address field.
- Check that the settings are correct and then click "OK".
The Tokyo Tech Mail System uses spam filters to mark certain messages as spam and store them in the "Spam" filter. If you configure filtering, your personal settings take priority over any spam filters.
If you want to give priority to the spam filters, see the Using spam filters in Webmail and configure your priority settings accordingly.
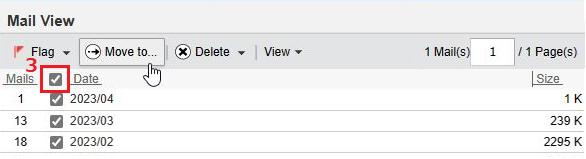
7. Selecting all the e-mails in a folder
Tokyo Tech Mail does not have a feature that lets you select all the e-mails in a folder. However, you can follow the steps below to make the selection process faster.- On the screen showing the list of your e-mails, select "Switch display".
- Select "Date".
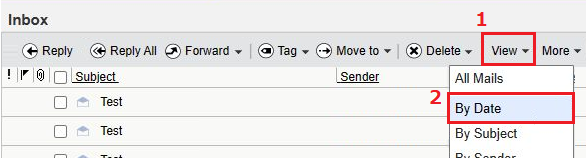
- This will group your e-mail messages into months. Select the check box next to "Date" on the top bar to select all the messages for that month.
- Then, you can "Move" or "Delete" all the selected e-mails.
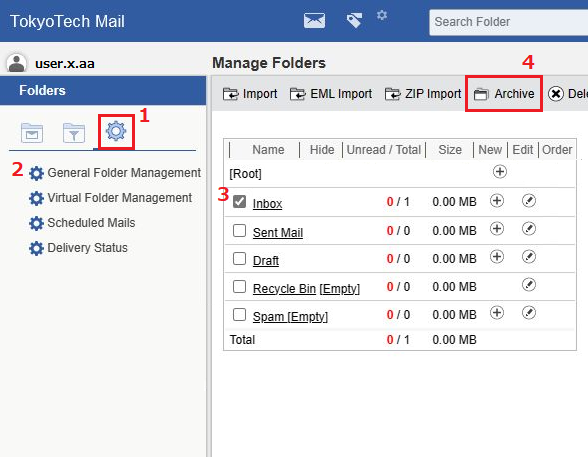
8. Saving e-mails
To save e-mails to your computer, try using the following procedure.- Select "Folder management" from the Mailbox menu.
- Select the folder that you want to save.
- Click "Export".
- Select the target format. If you want to save each e-mail as a separate file, select the "eml" format.
- After you click "OK", you will be able to download a .zip file containing the messages that you exported.

- If you are exporting a large folder, you can select the "Perform export procedures in the background" check box to have the system send you a notification e-mail when the process is complete. Repeat steps 1-3 after you receive the notification to show your exported files.